You’re scrubbing the shower at 9pm, the extractor fan whirring like it’s trying its best, and the black specks still won’t shift. Somewhere in the background your brain is doing that unhelpful thing - of course! please provide the text you would like me to translate. and of course! please provide the text you would like translated. - as if you’ve missed a step, used the wrong spray, or simply failed at being a functional adult with a bathroom. It matters because bathroom mould isn’t just ugly; it’s one of those tiny, persistent problems that drains time, patience, and often your lungs.
The strange part is how hard it feels. Not emotionally (though, yes), but physically: you expect mould to wipe away like soot, yet it clings like it’s been glued on. That “why is this tougher than it should be?” feeling has a surprisingly practical explanation.
The moment you realise you’re not scrubbing mould - you’re scrubbing a shield
Most of what we call bathroom mould isn’t a loose layer sitting on the surface. It’s a living community that builds itself a protective casing, and once that casing is established, the job stops being “cleaning” and becomes “breaking in”.
Mould and bacteria create what’s called a biofilm: a slimy matrix of sugars, proteins and gunk that acts like a raincoat. It holds moisture, traps dirt, and physically blocks cleaning products from reaching what you actually want to kill. So you scrub, the surface looks lighter, and a week later it’s back as if you did nothing. You didn’t do nothing - you just didn’t fully get past the armour.
This is why it often feels easier to clean a brand-new mark than a “normal” bathroom corner. The longer it sits, the more layered and stubborn that film becomes, especially in places that never properly dry.
Why bathrooms make biofilm ridiculously good at its job
Bathrooms are basically biofilm training grounds: warm, damp, and full of tiny nutrients you don’t notice. That’s not a judgement; it’s just physics plus human life.
Every shower creates a fine mist that lands on grout, silicone, and the underside of shampoo bottles. Soap residue (especially from bar soap), conditioner, skin oils, and limescale all add up to a thin buffet. Then the room cools, stays humid, and the moisture doesn’t just sit on top - it migrates into porous grout and sits there quietly. The mould doesn’t have to “fight” for survival; it just has to keep showing up.
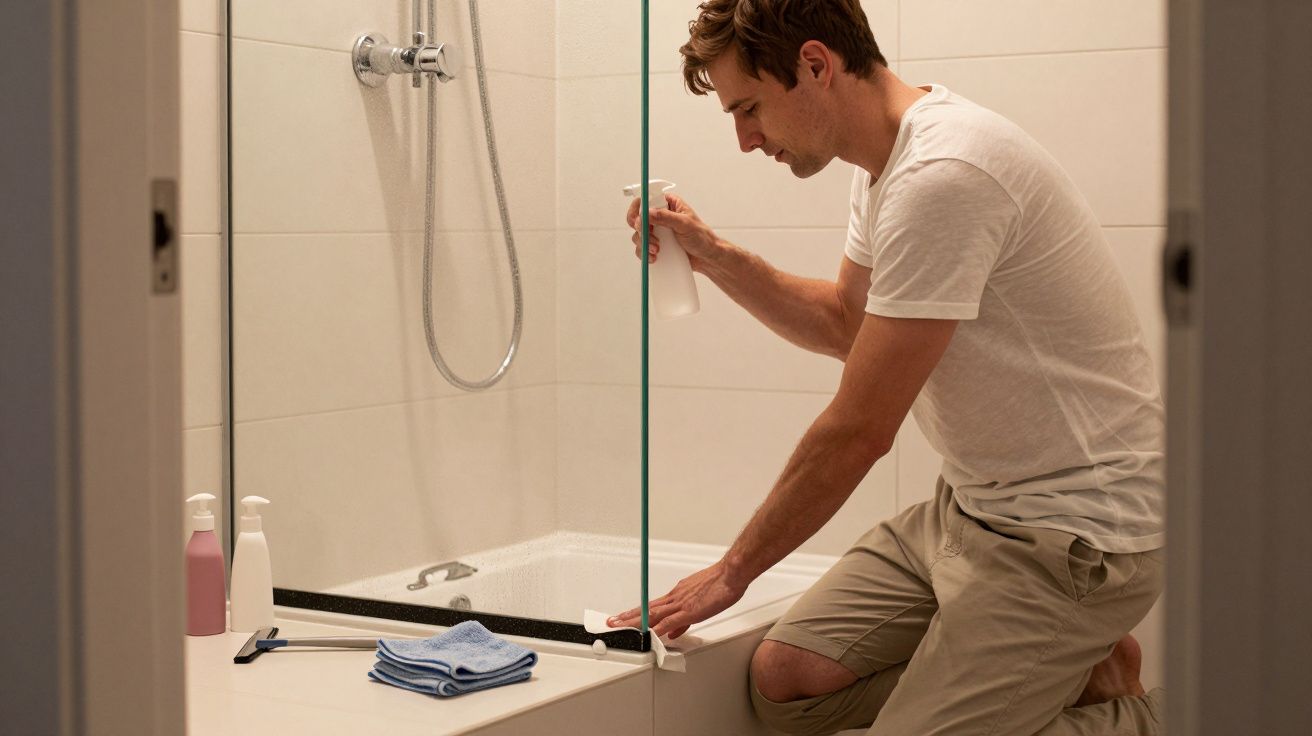
Silicone sealant makes it worse in a specific way. It’s smooth, but it can develop tiny micro-tears and edges where grime and moisture lodge. Once mould gets a foothold at those edges, it doesn’t behave like dust on a tile; it behaves like something rooted.
The cleaning mistake that makes it feel like an impossible task
The most common approach is also the most demoralising: spray, scrub immediately, rinse, repeat, escalate to stronger spray, scrub harder. It feels productive because your arm is doing a lot, but it’s not always the right order of operations.
Biofilm responds best to two phases:
- Break the film.
- Then disinfect what’s underneath.
If you disinfect first, the chemical can get used up reacting with surface gunk and never properly penetrate. If you scrub first without giving a product time to work, you’re relying on elbow grease to do a chemical job. And if you rinse too soon, you’re basically washing away your own advantage.
There’s also a psychological trap: you treat all “mould” like the same thing. Some of what looks like mould is staining from old growth, or grime held in limescale, or a mix of all three. You can kill the organism and still be left with a shadow that looks like failure.
A calmer way to tackle it (without turning your bathroom into a chemistry experiment)
You don’t need a cupboard full of products. You need time, targeting, and the willingness to let “dwell time” do the heavy lifting.
Step 1: Dry the area first, even briefly
If the sealant or grout is dripping wet, you’re diluting your cleaner on contact. Wipe it with a microfibre cloth or a bit of toilet roll and give it a couple of minutes with the fan on. You’re not chasing perfection; you’re removing the obvious water layer so the product can stick.
Step 2: Use contact, not just spray
For vertical silicone lines, spray tends to slide off before it can work. Soak thin strips of kitchen roll in your chosen product and press them onto the mouldy line like a compress. That contact is the difference between “it faded” and “it actually shifted”.
Leave it for the time on the label. If your instinct is to check every two minutes, you’re not alone - but this is one of those jobs where impatience costs you twice.
Step 3: Gentle agitation after the wait
Once the film has softened, a soft brush, old toothbrush, or non-scratch pad works better than raw force. You’re lifting and disrupting, not sanding your bathroom down. Rinse well, then dry the area so it’s not immediately rehydrating whatever remains.
A few choices that make the whole thing easier next time
- Run the extractor for 20–30 minutes after showers (timers help because nobody remembers).
- Pull bottles off the ledge so the surface can dry; those bottle rings are biofilm nurseries.
- Squeegee the glass and tiles if you can manage it - not for “sparkle”, but for dryness.
- Fix tiny leaks and drips. Constant micro-moisture is basically a subscription service for mould.
Why it keeps coming back in the same places (and what that’s telling you)
Recurring mould isn’t always a cleaning failure; it’s often a ventilation map. Corners, ceiling lines above the shower, the bottom edge of silicone, and the cold external wall are the spots where moisture lingers longest. If it’s always in the same strip, the bathroom is showing you where it doesn’t dry.
That’s why two households can use the same cleaner with wildly different results. One has a window that actually opens and a fan that vents outside; the other has a lazy extractor, a closed door, and towels drying indoors. Mould doesn’t care about your product loyalty. It cares about time-wet.
There’s also a material truth: old silicone can become permanently stained or colonised below the surface. Sometimes the real “clean” is removing and re-sealing, not scrubbing harder. It’s annoying, but it’s also clarifying - you stop blaming yourself for a job that has changed category.
The quiet win: making the bathroom less hospitable
You can’t sterilise a bathroom into submission, and you shouldn’t try. The goal is to shorten the time surfaces stay damp and reduce the film that gives mould its grip.
Think of it like this: you’re not trying to defeat mould in a single heroic clean. You’re trying to make it slightly less comfortable living there. When the room dries faster, the biofilm struggles to rebuild, and your “big scrub” turns into quick maintenance instead of an evening-long wrestling match with the shower.
FAQ:
- Is black mould always dangerous? Not always, but it’s a sign of persistent damp and poor drying. If you have asthma, allergies, or a large affected area, take it seriously and consider professional advice.
- Why does bleach sometimes “work” but the mould returns? Bleach can lighten staining and kill surface growth, but it may not penetrate porous grout or fully disrupt biofilm. Drying and ventilation are what prevent the comeback.
- Do I need to replace the silicone? If the mould is under the sealant, keeps returning immediately, or the silicone is cracked and peeling, re-sealing is often the only lasting fix.
- What’s the best daily habit to prevent it? Run the extractor long after showers and keep surfaces as dry as possible (squeegee, wipe ledges, move bottles). The less “time-wet”, the less mould advantage.


Comments (0)
No comments yet. Be the first to comment!
Leave a Comment